Magical Girl Saga Devlog[1]
A New Start... Godot 4 and C#
Hello everyone and welcome to devlog #1 for my 2D JRPG indie game, Magical Girl Saga! In this devlog, I'll discuss the changes and progress I've made to the game since the last time plus key you in on some new things, so without further ado, let's get right into today's devlog.
Part 0 - A New Starting Point
As the title of this devlog implies, I have decided to make a major change in how I develop Magical Girl Saga! I have decided to switch over from developing the game in Java with the Java Swing library to using Godot 4 and C# as the primary development stack behind Magical Girl Saga. Now, you may be wondering why I made this change and simply put: I want to make and have big ideas and features for Magical Girl Saga that I'm afraid either can't be implemented properly or would take a lot of extra code to implement and I simply wanted to have an easier way of programming all the different mechanics of the game without having to worry about limitations associated with the Java programming language. While I was I could continue development in Java, it just is not optimal for the type of game that Magical Girl Saga aspires to be, so I decided to a similarly syntaxed language in C# and picked up the engine, Godot. Now I chose Godot because I've heard nothing but good things about Godot for 2D games and I figured it'd have less of a learning curve compared to other engines and it supported the language I wanted to use for development, C#, so I ultimately chose to develop with Godot. I'm excited to show you the progress I've made since switching to C# and Godot, so I will go ahead and document them here.
Part 1 - Switching From Java to Godot and C#
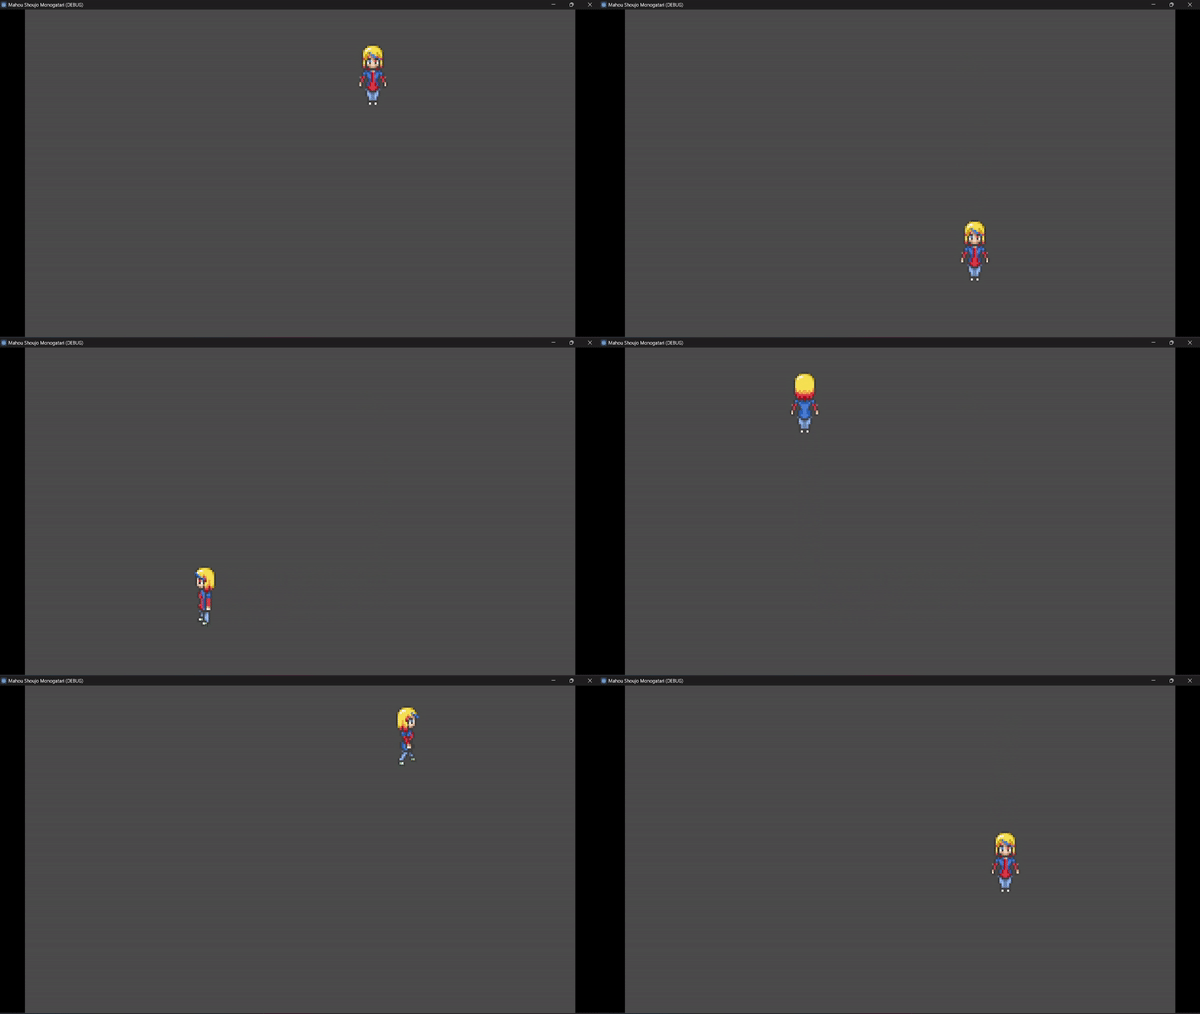
Now one of the first things I implemented in Godot 4 (and arguably one of the most important) is 4 directional movement for the player character. Now this took me quite a lot of fiddling and figuring out a way to make it work, but I think I've got a good idea on how animated 4 directional movement works in Godot. First, I used Godot's preassigned movement keys to map the player's movement in a Vector2D called velocity and map the X and Y coordinates of said Vector2D to either 1 for a positive direction or -1 for negative direction and used that to create player movement in each of the 4 directions. Then, I used an AnimationPlayer node and divided a sprite sheet into 8 sets of animations, an Idle animation for each of the 4 directions plus walking animations for each of the 4 directions. This was implemented by setting a string value, currentAnimation, to the name of the animation that should play when the player's velocity vector is changed, with the direction being determined by a direction vector, also mapped the same way the velocity vector is mapped. With a combination of a direction and velocity vector, I was able to successfully animate the player walking and idling in each of the 4 directions and thus, 4 directional movement was implemented easily into the game.
Here's the example I came up with for getting 4 directional animated movement in Godot 4 using C#:
        using Godot;
        using System;

        public partial class player_jeanne : CharacterBody2D {

            [Export]
            public int Speed = 100; // How fast the player will move (pixels/sec).

            public Vector2 ScreenSize; // Size of the game window.

            private AnimationPlayer animationPlayer;
            private string currentAnimation = "idle_down";

            public override void _Ready() {
                ScreenSize = GetViewportRect().Size;

                // Get the AnimationPlayer node.
                animationPlayer = GetNode("AnimationPlayer");
            }

            public override void _PhysicsProcess(double delta) {
                var velocity = Vector2.Zero; // The player's movement vector.
                var direction = Vector2.Zero; // The player's movement direction.

                if (Input.IsActionPressed("move_right")) {
                    velocity.X += 1;
                    direction.X += 1;
                    currentAnimation = "walk_right";
                }

                if (Input.IsActionPressed("move_left")) {
                    velocity.X -= 1;
                    direction.X -= 1;
                    currentAnimation = "walk_left";
                }

                if (Input.IsActionPressed("move_down")) {
                    velocity.Y += 1;
                    direction.Y += 1;
                    currentAnimation = "walk_down";
                }

                if (Input.IsActionPressed("move_up")) {
                    velocity.Y -= 1;
                    direction.Y -= 1;
                    currentAnimation = "walk_up";
                }

                if (velocity != Vector2.Zero) {
                    velocity = velocity.Normalized() * Speed;
                    animationPlayer.Play(currentAnimation);
                }

                else {
                    animationPlayer.Play(currentAnimation.Replace("walk", "idle"));
                }

                MoveAndCollide(velocity * (float)delta);
            }
        }
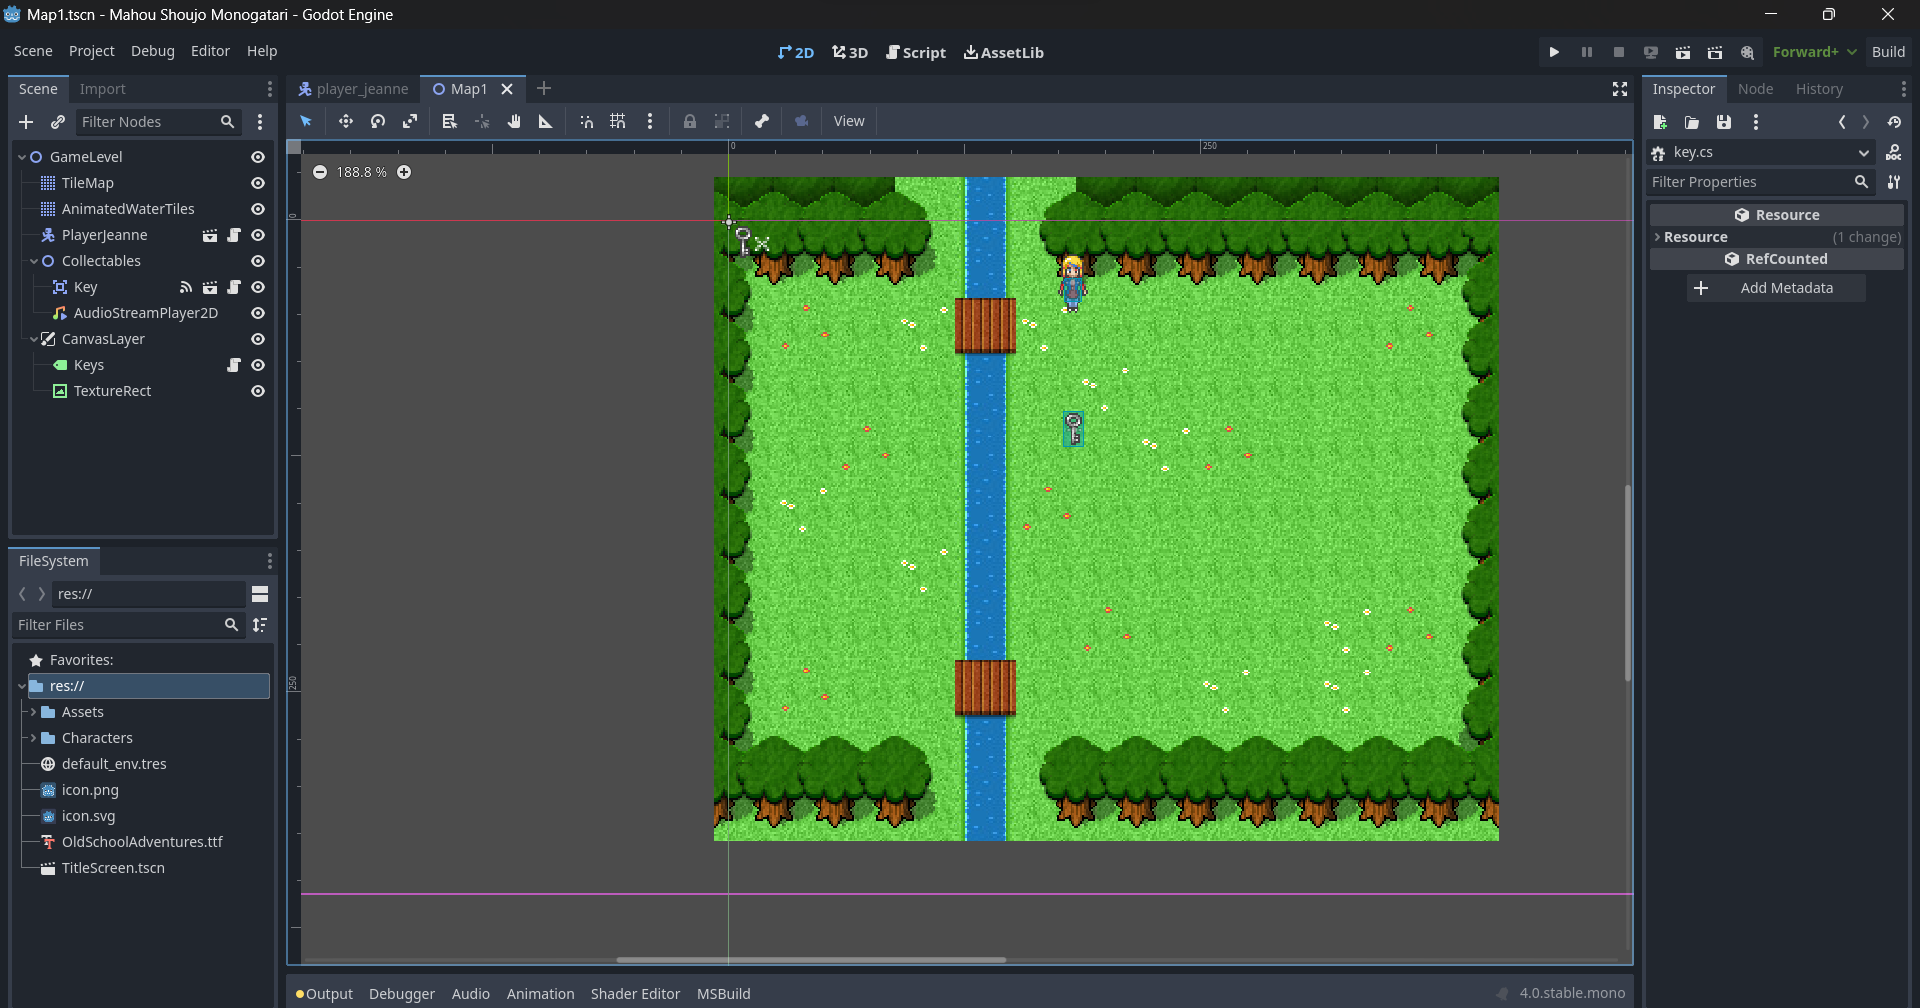
After implementing 4 player movement in Godot, I decided my next goals would be to work on implementing the tilemaps and player-object collision. So I separated my tiles into two tilemaps: One which held all the assets for the forest environment of the game and the other being just the three frames of the river water animation, as I had plans to make this part of the map animated, so with that implemented, I then fiddled with drawing a sample map for the player to run around in. After getting the two tilemaps implemented into the game, my next step was to add collision to the tiles that needed collision, so using Godot 4's built in tilemap editor, I was able to easily add custom collision polygons to the tree tiles so the player can't walk through the tree tiles anymore. Once the tile collision was done, the next thing I moved onto was object collision, so the first thing I did was created a collectable object as a key which can be picked up and added to the player's key count. I did this by creating an Area2D node in the main map's scene and added the following C# script to the Key object in order for it to register when the player collides and thus picks up the key and when to make the key disappear upon collision from the map so that the player doesn't pick up the key over and over again:
        using Godot;
        using System;

        public partial class key : Area2D
        {
            [Export]
            private AudioStream pickupSound; // Reference to the sound effect to be played

            private void _on_body_entered(Node2D body)
            {
                if (body is player_jeanne jeanne)
                {
                    jeanne.hasKey++;

                    // Play the sound effect if pickupSound is assigned
                    if (pickupSound != null)
                    {
                        var audioPlayer = GetNode("/root/GameLevel/Collectables/AudioStreamPlayer2D");
                        audioPlayer.Stream = pickupSound;
                        audioPlayer.Play();
                    }

                    QueueFree();
                }
            }
        }
I also added a little sound effect that plays when the player picks up the key, which is just a simple 1 second jingle that'll make it clear an item was just picked up by the player.
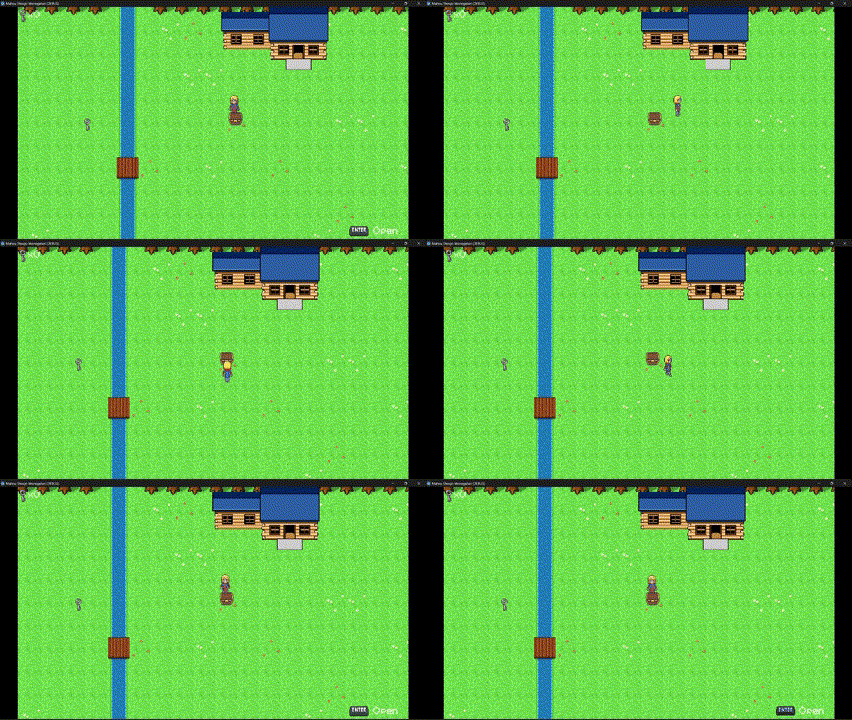
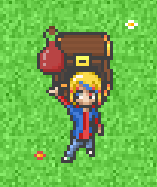
The next step was implementing objects that the player can interact with and my first choice for an interactable object was a chest that contains various items the player can use, such as potions and keys. So, I implemented the chest node as a StaticBody2D node with an Area2D child node and a CollisionShape2D child node, with the Area2D child node having a CollisionShape2D child node. I did this so that way, the chest object has collision so the player cannot just walk through the chest while also allowing for a special area around the chest that would allow me to add in an interaction prompt to the UI when the player is in front of or otherwise colliding with the chest. I then added a Sprite2D node to add the actual sprite, then wrote two methods in a chest.cs script, one for handling setting the items in the chests when the chests are loaded into the game's current scene and another that displays the correct item above the player's head when opening and obtaining the item from the chest.
    private void SetItemInChest()
    {
    // Use a switch statement to handle different itemNum cases
        switch (itemNum)
        {
        case 0:
            itemInstance = (red_potion)Activator.CreateInstance(typeof(red_potion));
            Node targetNode = GetNode(".");
            targetNode.AddChild(itemInstance as Node);
        break;

        case 1:
            itemInstance = (key)Activator.CreateInstance(typeof(key));
            targetNode = GetNode(".");
            targetNode.AddChild(itemInstance as Node);
        break;
        }

        switch (chestNum)
        {
        case 0:
            itemNum = 0;
        break;

        case 1:
            itemNum = 1;
        break;
        }
    }


    private void OpenChest()
    {
        Node chestsNode = GetNode(".");
        var sprite = GetNode("ChestSprite");
        sprite.Texture = (Texture2D)OpenSprite;

        isOpen = true;
        player.isOpening = true;
        player.currentAnimation = "item_get";

        // Play the sound effect when chest is opened
        if (itemObtainedSound != null)
        {
            var audioPlayer = GetNode("/root/GameLevel/Chests/AudioStreamPlayer2D");
            audioPlayer.Stream = itemObtainedSound;
            audioPlayer.Play();
        }

        if (itemInstance != null)
        {
            switch(itemInstance) {
                case red_potion:
                    red_potion item = (red_potion)itemInstance;

                    var scene = GD.Load("res://Assets/Objects/red_potion.tscn");

                    var itemInstanceNode = (red_potion)scene.Instantiate();

                    player.GetParent().AddChild(itemInstanceNode);

                    itemInstanceNode.Position = player.Position - new Vector2(10, 20);

                    GD.Print("Received item from chest: ", itemInstanceNode.name);
                break;

                case key:
                    key keyItem = (key)itemInstance;

                    scene = GD.Load("res://Assets/Objects/key.tscn");

                    var keyInstanceNode = (key)scene.Instantiate();

                    player.GetParent().AddChild(keyInstanceNode);

                    keyInstanceNode.Position = player.Position - new Vector2(10, 20);

                    GD.Print("Received item from chest: ", keyInstanceNode.name);
                    player.hasKey++;
                break;
                }

            }
} 
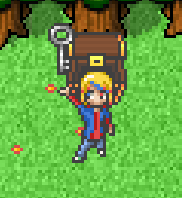
The next step was to add in some dialogue, so using a RichTextLabel node as well as a simple C# script that takes the preset dialogue and displays it character by character in the dialogue window, we now had dialogue implemented into the game.
using Godot;
using System;

public partial class dialogue_window : Node2D
{

[Export]
public AudioStream talkSound;

public string currentDialogue = "";
int charIndex = 0;
string combinedText = "";
char[] characters;

Sprite2D dialogueBox;
Node2D ui;
RichTextLabel dialogueText;
Timer timer;

public void drawDialogue()
{
    dialogueBox = GetNode("DialogueWindow");
    dialogueText = GetNode("DialogueText");
    timer = GetNode("DialogueText/Timer");
    ui = GetNode("/root/GameLevel/CanvasLayer/Overworld_UI");

    if (currentDialogue != null)
    {
        dialogueBox.Visible = true;
        ui.Visible = false;

        foreach (string line in currentDialogue.Split("\n"))
        {
            dialogueText.Text = line;
        }

        characters = currentDialogue.ToCharArray();

        for (charIndex = 0; charIndex < characters.Length; charIndex++) {
            timer.Start(0.025);
            combinedText +=characters[charIndex];
            currentDialogue=combinedText;
            dialogueText.Text=combinedText; }
        }
    }
    private void _on_timer_timeout() {
        dialogueText.VisibleCharacters++;
        if (talkSound !=null && dialogueText.VisibleCharacters <=characters.Length)
        {
            var audioPlayer=GetNode("/root/GameLevel/CanvasLayer/DialogueSystem/talkSound");
            audioPlayer.Stream = talkSound;
            audioPlayer.Play();
        }

        if (dialogueText.VisibleCharacters >= characters.Length)
        {
            timer.Stop();
        }
    }
}
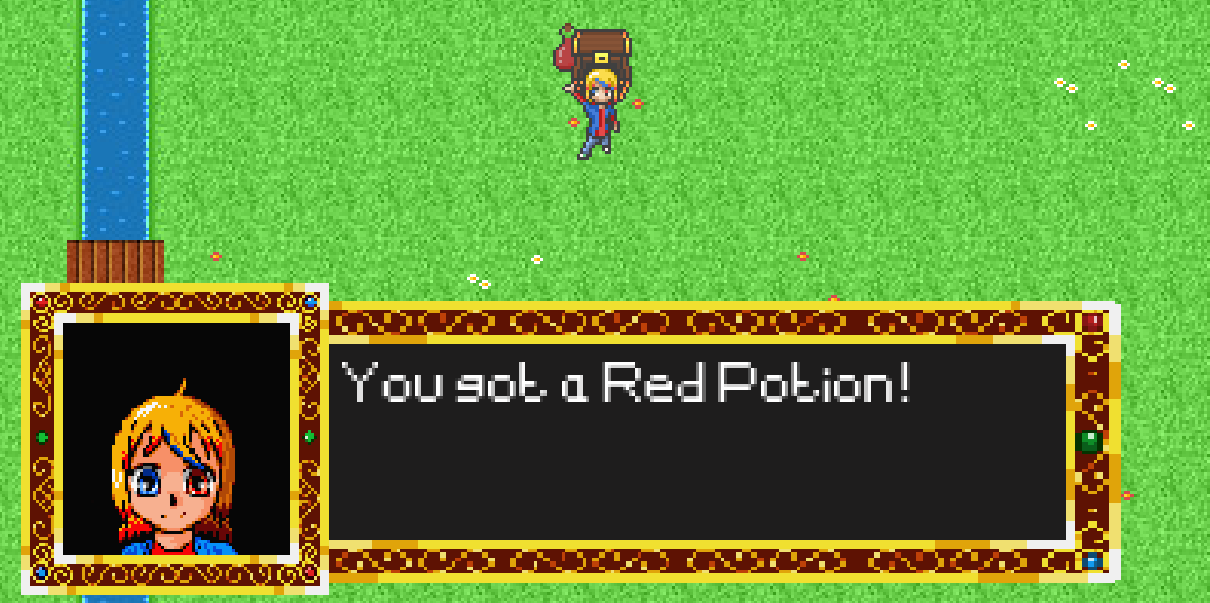
And finally for this devlog, I fiddled around with Godot's Y sorting feature to make it so that when the player stands behind a chest, the chest is in front of the player and when the player is in front of the chest, the chest is behind the player. Now this took a lot of fiddling and a few hours on its own to figure out, but after fiddling with the Y sort enabled setting on my player and chest nodes, I was able to finally get it to behave as intended.
